
Today I wanted to share some of the writing tools I’ve discovered over the years, tools that have helped me along on my writing journey. Lest this post become unwieldy, I’ve limited myself (for now) to four different types of tools: a writing blog, submission tracker, software, and hardware. I incorporate all of these in my regular writing routine.
Note: None of this is sponsored, I just really like these things.
Blog: Jane Friedman
I’ve mentioned this one several times on my site, but it bears repeating because it’s one of my go-tos for writing resources and how-to articles. From basics like how to write a query letter to deep dives into craft topics, there is something for writers of every level. I look forward to the digest email every Sunday.
Visit Jane Friedman’s blog here and see for yourself.
The Pros! You’ll learn a lot.
The Cons? Reading takes time, I guess?
Bonus recommendation! I recently read Jane’s book The Business of Being a Writer. While it is dense, it’s not necessarily meant to be read cover to cover. Pick and choose the topics most interesting to you based on the kind of writer you are (academic, literary, short fiction, novels, commercial) and the stage you’re at in your career (e.g. What is a query letter? How to make best use of a publicist prior to book launch). 2025 UPDATE: Jane just released a second edition of her book, which has many more useful resources and updated information.
Submission Tracker: QueryTracker and The Submission Grinder
If you’re submitting to literary agents, QueryTracker is your best friend. I use it both to find agents and to track my submissions. It’s also linked to QueryManager, which many agents use, so sometimes it will log and track submissions automatically. I do pay for the premium account, which costs $25 a year, but that is absolutely not necessary; the free version gives you plenty of functionality and I got along with it for years without feeling like I was missing out. I’ve already discussed QueryTracker on this site, so you can read more about it in this post: How to Find a Literary Agent.
If you’re more inclined towards short stories or poetry, The Submission Grinder is my preferred tracker. They’re a little old school, but their search function is great at sorting magazines by genre, whether they pay, accept simultaneous submissions, and more. This is where I go to find new markets to submit to. ChillSubs has a lot of cool options and a sleeker design, but they’re still developing and their database isn’t as robust as the Submission Grinder’s is, so for now I’m sticking with what works.
Check out The Submission Grinder here.
Software: Scrivener
I’m typically the last person to try a new product, especially if it costs money or, worse, it’s popular! What’s wrong with doing things the old way, so long as they work? Friends, I thought the same about Scrivener, and boy was I wrong.
Do you absolutely need it? No. You can get by with simpler word processors like Microsoft Word, Mac’s Pages, a free software like OpenOffice, or other methods of writing like typewriters or a notebook and pen. However, after using Scrivener for years, it’s something I recommend to any writer who has more than a two-second conversation with me.
What is it? Scrivener is a word processor, but it’s also a means of organizing your thoughts, plot, research, and more.
What are the Pros? Instead of opening multiple word documents (WIP, character names, character timeline, outline, etc.), it’s all in a single convenient place, easily searchable too, if you can’t remember where you’ve put something. With the ability to save each draft of a scene, color coding, keywords, a phenomenal “corkboard” for organizing the plot, and windows for notes and scene synopsis, the pros are many.
What about the Cons? Most notably, it costs money, (a one time $60 expense) although it’s way less than you’ll end up spending on a program like Microsoft Word and the publisher used to offer a discount for anyone who finished NaNoWriMo or Camp NaNoWriMo. I think I paid $30 or $40 for mine.
The real, if temporary, drawback is that it has a learning curve. It’s not like any other word processor you’ve used and there are so many tools at your disposal that take time to get used to.
My suggestion? Download the 30 day free trial and go through the tutorial a few times to get the feel of it. Give yourself a period of time to experiment without the pressure of working on your WIP. I’m sure, like me, you’ll end the month wondering how you ever got along without it.
Get a 30 day trial of Scrivener here.
Hardware: A Notebook (Craft Time!)
One of the most basic tools in a writer’s arsenal is a notebook to carry around and jot observations, ideas, snatches of dialogue, or (let’s be real) a grocery list.
This is a super simple pocket notebook that anyone can make with materials you probably already have around the house.
Materials
14 sheets of 8.5×11 printer paper or lined notebook paper
1 sheet 8.5×11 cardstock (any color) or similar, like an old birthday card with a nice front
scissors or paper cutter
ruler
pencil
awl, needle, or something with a sharp point
string like embroidery thread, cotton string, yarn, even birthday ribbon
Instructions
1. Take your printer paper and cut it in half so you end up with sheets 8.5″ wide and 5.5″ tall. Do the same with your cardstock or cut your greeting card to the same size.
2. Fold your sheets in half so the folded paper is 4.25″ wide and 5.5″ tall.
3. Using a ruler and pencil, mark on your paper where your holes are going to go. I’d recommend a minimum of three, for stability. My preference is six holes. Starting from the bottom of my paper, I make my first hole 1″ up, then every 3/4″ from there. Use the same measurements to mark holes on your cardstock.
4. Use something sharp to poke the holes in the paper and the cardstock. I used a sewing pin before I bought an awl. Just make sure you put something underneath the paper to protect your table!
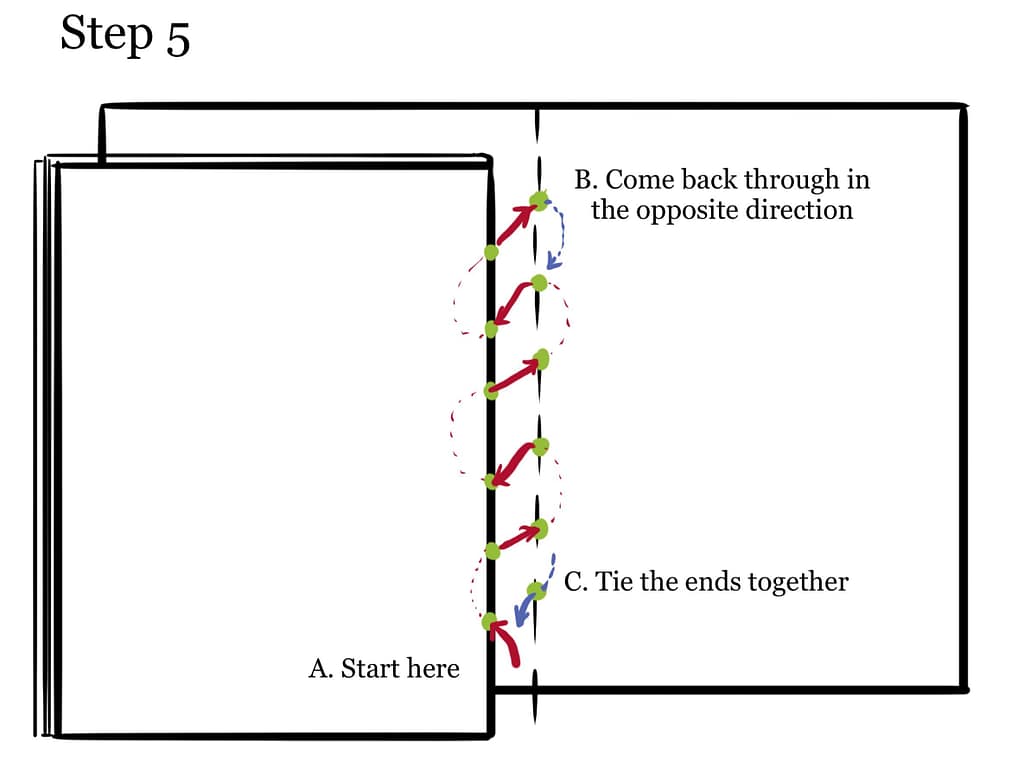
5. Run your thread through the holes to bind. You may need a needle for this, or a piece of tape wrapped around the end of the string depending on what material you’re using. This got a little confusing so I made a little diagram:
To hide my knot, I start on the outside of the folded paper, passing through the bottom hole (step A). Come back out through the second hole, this time through the cardstock as well. Keep going in and out, passing through all the layers. When you get to the top hole, go back through in the opposite direction (step B), making sure the thread is pulled tight. Tie your knot at the bottom (step C).
6. You have a notebook! You can draw or color on the outside if you like, or just shove it into your pocket and go out to find writing inspiration.
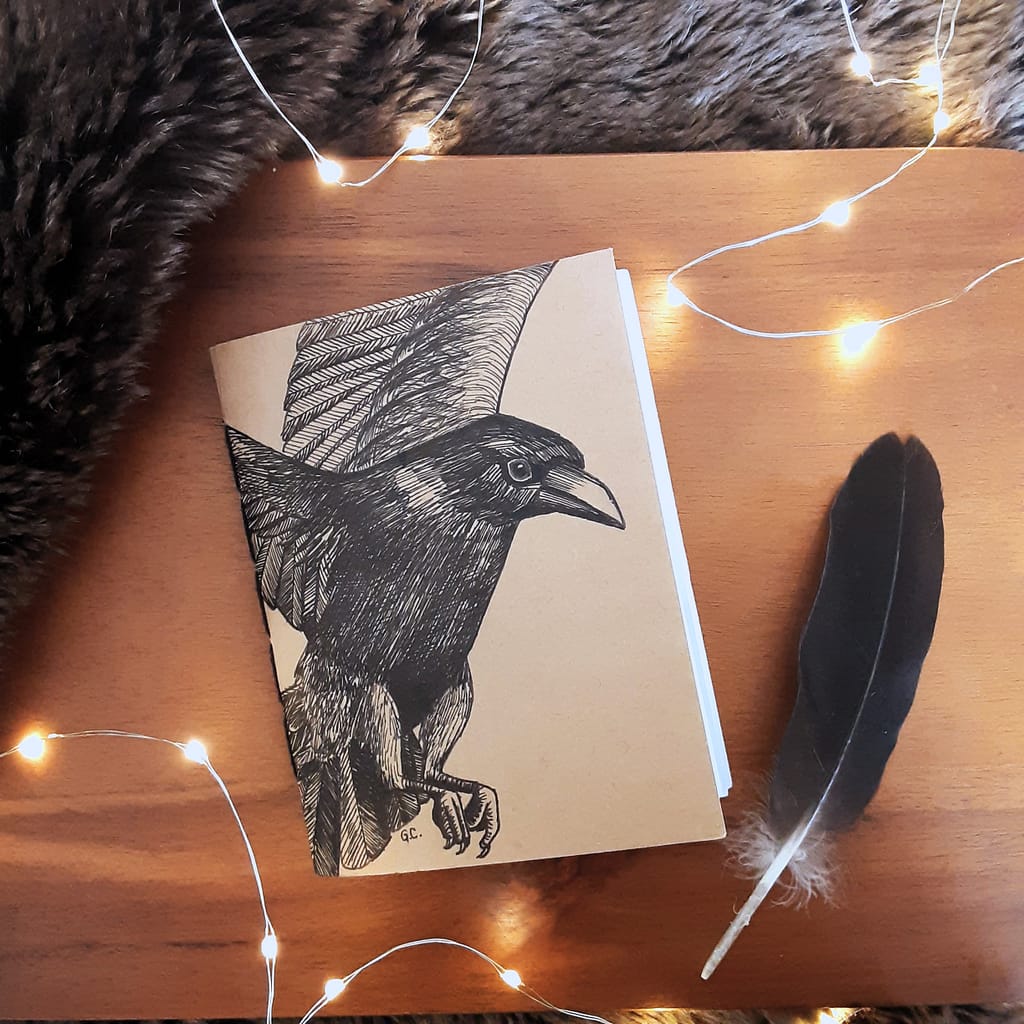
Here’s my latest version.
In Conclusion…
Maybe you’re now a diehard Scrivener user. Maybe all you got out of this post was a cool new notebook. Either way, hopefully something on this list was helpful to you.
Happy writing!